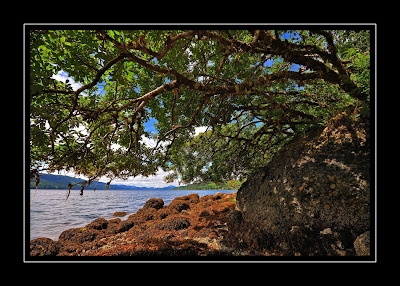
This is the combination of 3 pictures using the HDR feature in CS4. I tried to make this picture as realistic and true to life as I could though I'm still not entirely sold on whether HDR makes for better pictures or not. Perhaps my technique needs fine tuning... Just the same this seems to be the amount of light/dark I was able to see at the time I took the pictures.

This is a very nice picture! You have done a good job on producing this picture as a true life event.
ReplyDeleteI have tried many time to make my pictures as a HDR image, but I'm still having problem getting the tonal contrast as I wanted.
The way I understand how to make a HDR image is that requires capturing a series of identically-positioned exposures, a sturdy tripod is essential. Photoshop has a feature which attempts to align the images when the camera may have moved between shots, however best results are achieved when this is not relied upon.
Make sure to take at least three exposures, although five or more is recommended for optimum accuracy. More exposures allow the HDR algorithm to better approximate how your camera translates light into digital values (a.k.a. the digital sensor's response curve.
High dynamic range (HDR) images enable photographers to record a greater range of tonal detail than a camera could capture in a single photo. This opens up a whole new set of lighting possibilities which one might have previously avoided — for purely technical reasons. The new "merge to HDR" feature of Photoshop accomplishes this by combining a series of bracketed exposures into a single image, which encompasses the tonal detail of the entire series.
There is no free lunch however; trying to broaden the tonal range will inevitably come at the expense of decreased contrast in some tones. Learning to use HDR software can help you make the most of your dynamic range under tricky lighting — while still balancing this trade-off with contrast.
As with all new tools, be careful not to overdo their use. Use care when violating the image's original tonal hierarchy; do not expect deep shadows to become nearly as light as a bright sky. In our doorway example, the sunlit building and sky are the brightest objects, and they stayed that way in our final image. Overdoing the HDR effect can easily cause the image to lose its sense of realism. Furthermore, HDR should only be used when necessary; best results can always be achieved by having good lighting to begin with.
Good Luck!
I don't know about the HDR, I like this shot though. Everything is in focus, all the way out to the moutains on the horizon. By the way, is that a big clump of sea shells or rocks to the right?
ReplyDeleteI'm not completely sold on the whole HDR thing just yet. I think you can do just about the same thing by taking a really good picture to start with and the making a few adjustments as necessary in a photo program. That's basically what the HDR is doing anyway but you don't have to have 3-5 shots to do it.
I guess I will have to go out and do a little bracketing on some shots and try the HDR to see what happens.
Very well composed. Trees framed the water and mountain background,bringing my gaze from front to back.
ReplyDeleteI too have not made my mind up on HDR or how much to process a photo using the editing programs availabel. Taking one's time to properly compose a shot shouldn't require much more than a crop. Then again it sure is a luxury to be able to take shots on the fly then let the editing program make you look good!